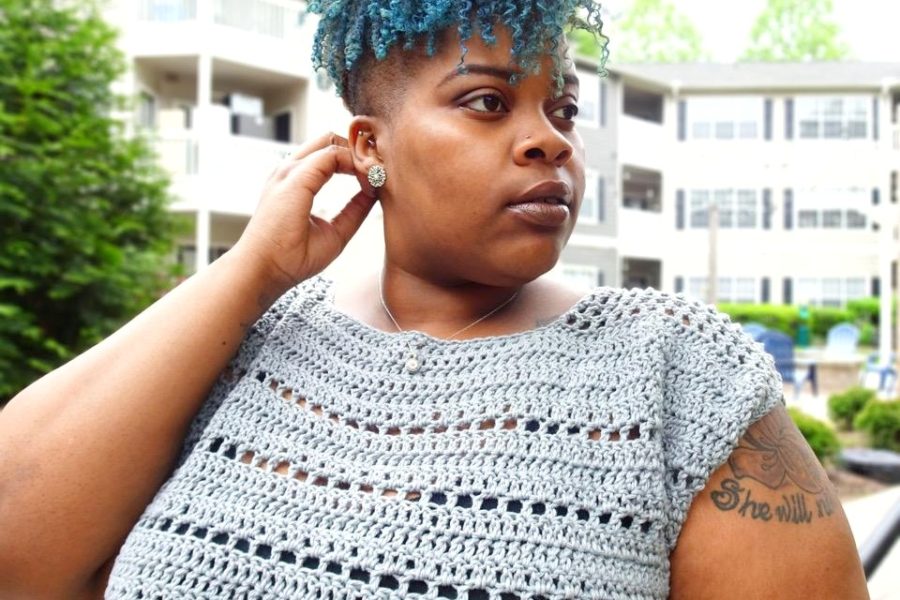
Don’t call it a comeback – the Summer Breeze Crochet Crop 2.0 is ready for it’s close up (again), but this time with some tweaks and expanded sizes! If you’d like to know more about how this crochet crop top came to be, keep reading. Or scroll down to get right to the free pattern!
This post may contain affiliate links.

I am a cotton yarn hoarder. Now don’t get me wrong, I am still a lover of all yarn, but cotton and cotton blends just have a special place in my heart. I’ve been holding on to this Lion Brand Comfy Cotton Blend yarn in the color Silver Lining for about a year and a half now, and it has been begging to be used. So I figured, why not make another Summer Breeze Crop top since it utilizes Comfy Cotton. As I began the project, I realized that I wanted to switch a few things up because let’s face it, I’m not the same person that I was last year and my style has changed a little.

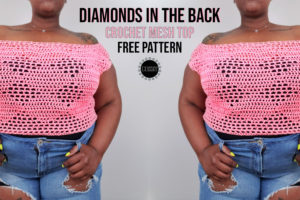
Crop tops are still my jam (Check out the Diamonds in the Back Top), and I don’t see that changing anytime soon. But I knew I wanted this crop top revamp to be just a tiny bit longer to better suit all body types. Now because this is a slightly oversized top, I decided to add just a bit more ease in the pattern as well for a more flowy fit. The extra ease makes this the perfect top to throw on over a tank or even a dress! The Summer Breeze Crochet Crop originally only came in sizes, but with size inclusivity being a big topic in the fiber world and one that is near to my heart, I decided the SBCC 2.0 will be extended to XS-5XL so that everyone can be fabulous! With this being such a simple pattern it can also be easily adjusted to fit any size!

The Inspiration
During this quarantine, I’ve thought a lot about how far I’ve come in my crochet career. I’ve had the time to take a closer look at some of my older patterns, and boy oh boy have I changed. This is not to say that the old patterns are bad (you should definitely still check them out lol), but I can definitely see that my knowledge and technique have blossomed. Not only am I taking time to evaluate myself crochet wise, but I’m also reflecting on myself as an individual. We get so busy and wrapped up in the day to day hustle that we forget to take care of ourselves. So I’ve decided to make more time to get to know me, my wants, my needs, and my aspirations. And once I’ve mastered me, I can take on the world with full confidence.

The Yarn
Let’s talk a bit more about Lion Brand’s Comfy Cotton Blend yarn. As I was saying before, cotton yarn is one of my favorites, but this particular yarn stands out for me and here’s why. First, it is a category 3-Light yarn, so it’s just right for summer makes. Now, I am not the biggest fan of DK weight yarn. Between the thinness and how long it takes to work up, it just isn’t a go to for me. But I can say that the Comfy Cotton Blend is the perfect size to work with in my opinion. Not too thin, but also not too thick, and I can use a slightly larger hook and still get an amazing finish. Now for my favorite part, the blend. This yarn is made up of 50% cotton and 50% polyester for a super soft finish. Cotton yarn by itself, depending on the brand, can get a bit rough to work with sometimes, but the mix of polyester in this yarn makes it almost as soft as a baby yarn. Who doesn’t like soft right?

Yarn Subs
Now if you can’t get your hands on any Comfy Cotton blend, don’t worry, you can still make this top. This yarn can be substituted for any category 3 yarn, it doesn’t have to be cotton. Or if you’re working from your stash and DK weight yarn is just not your thing, you can also use a worsted weight category 4 yarn, but definitely check your gauge and hook size to be sure your top fits correctly.
Patterns I Love


Wrap Me Up Crochet Crop Bubblegum Tee
Summer Breeze Crochet Crop 2.0 Pattern
- Get the printer friendly, ad free PDF version of the pattern here.
- CLICK HERE to pin for later
- CLICK HERE to fave on Ravelry
Materials
- I/5.25 mm crochet hook
- Approx. 650 – 800 yards of Category 3 “Light” yarn
- Sample made with Lion Brand’s Comfy Cotton Blend
- Scissors
- Stitch Markers
- Needle for weaving in ends
- Your favorite show to “watch”
Gauge
4 inch square = 13 sts x 7 rows of Dc
Finished Size
- Bust – 31(35, 39, 43, 47, 51, 55, 59, 63)”
- Length – 18.5(19.5, 19.5, 19.5, 20.5, 20.5, 20.5, 21.5, 21.5)”
- XS(S, M, L, XL, 2XL, 3XL, 4XL, 5XL)
- 1.5″ – 2″ of positive ease. Be sure to check gauge to size appropriately
Abbreviations
- Fdc – Foundation double crochet
- Ch – Chain
- Sc – Single Crochet
- Dc – Double Crochet
- Sl st – Slip Stitch
- St – Stitch
- Sts – Stitches
- Rep – Repeat
- Sk – Skip
- Rs – Right Side
Pattern Notes
- The pattern is written for size XS with S, M, L, XL, 2XL, 3XL, 4XL, and 5XL in parentheses. Not all rows are the same for every size. Be sure to follow the instructions for the size you’re making.
- This pattern is worked in panels from the bottom up.
- Ch 3 does count as a stitch.
Special Stitches
- Fdc – Foundation double crochet. Click here to learn more about foundation stitches.
Start Here…
Panel (Make 2)
Row 1: Fdc 51(57, 63, 69, 77, 83, 89, 95, 103). Turn.
Rows 2-4(5, 5, 5, 6, 6, 6, 7, 7): Ch 3 (counts as a st). Dc in each st across. Turn.
Row 5(6, 6, 6, 7, 7, 7, 8, 8): Ch 4 (counts as dc + ch 1). *Sk next st. Dc in next st. Ch 1. Rep from * to end of row. Turn.
Row 6(7, 7, 7, 8, 8, 8, 9, 9): Ch 3. *Dc in next ch-1 sp. Dc in next st. Rep from * to end of row. Turn.
Rows 7-8(8-9, 8-9, 8-9, 9-10, 9-10, 9-10, 10-11, 10-11): Ch 3. Dc in each st across. Turn.
Next Steps: Rep rows 5-8(6-9, 6-9, 6-9, 7-10, 7-10, 7-10, 8-11, 8-11) until you’ve reached the end of row 25(26, 26, 26, 27, 27, 27, 28, 28). Should end on a mesh row.
Row 26(27, 27, 27, 28, 28, 28, 29, 29): Ch 3. *Dc in next ch-1 sp. Dc in next st. Rep from * to end of row. Turn.
Rows 27-29(28-31, 28-31, 28-31, 29-33, 29-33, 29-33, 30-35, 30-35): Ch 3 (counts as a st). Dc in each st across. Turn.
DO NOT FASTEN OFF. CONTINUE TO SHOULDER SECTION.
Shoulder
Row 1: Ch 4 (counts as dc + ch 1). *Sk next st. Dc in next st. Ch 1. Rep from * until there are 6(8, 10, 12, 14, 16, 18, 20, 22) mesh boxes worked. Turn
Rows 2-4: Ch 4. *Sk next ch-1 sp. Dc in next st. Rep from * to end of row.
Note: For one of the panels, do not fasten off after shoulder section. Remove hook from loop and cut yarn leaving long tail for seaming.
Assembly
• All assembly is done with a sl st. Feel free to use your preferred method.
• Lay panels with RS facing each other.
• Seam the front panel to the back panel with sl st across shoulder only.
• Seam sides of front panel to back panel leaving an armhole depth of 6.5(7, 7.5, 8, 8.5, 9, 9.5, 10, 10.5) inches.
• Repeat on other side of panel.
• Turn project RS out and proceed to edging.
Edging
• Step 1: With RS facing outward, attach yarn to the inside shoulder seam near neckline.
• Step 2: Ch 1. Sc evenly around neckline. Sl st to 1st st.
• Note: For the mesh rows, work 2 sc per mesh box.
Sleeves
• Step 1: Attach yarn to bottom seam of armhole. Ch 1. Sc evenly around armhole. Sl st to 1st st.
Note: For mesh rows, work 2 sc per mesh box.
• Step 2: Ch 1. Sc in each st around. Sl st to 1st st.
Fasten off and weave in all ends.


